Pages

Thursday, March 2, 2017

Disney Hacks: Saving Money $

Looking for NO-FEE Concierge Disney Vacation Planning? I'd love to chat with you about how to make your family's Disney Vacation (World, Land, Cruise, Aulani, Hilton Head, Adventures) seamless, fun (even for you Mom!) and full of life-long memories. Email me at Lareina@WaltsWorldVacations or on Facebook at Lareina with Walt's World Vacations.

By any measure a trip to Disney World is pricey. Here are some tips on how to save on your Disney Vacation before you book and while you're there. Follow my tips to help you #HackYourDisneyVacation.


1. We signed up for a Disney Visa credit card. They offer a $200 credit, but charge a $50 annual fee. This gave us a net $150 credit. We purchased our 4 annual passes using the Disney credit card and got about $75 in rewards for purchases at Disney. There are other perks including a special meet and greet for Visa card members. 


2. We bought night time items for the parades and to keep our group together. This is what we purchased on Amazon and were happy with the products. These really helped to keep track of the kids and join in the glowing fun of the night at the parks. 

3. We bought these kids thermoses and filled them with boiling water for 10 min (then discarded the water) and added hot mac n cheese, pasta or hot dogs (left those in the water after cooking them). The food was still piping hot and we saved a lot of money not having to purchase them lunches they may or may not eat - depending on their mood. It was also nice not to have to wait in lines for food when they were hungry. Disney has lots of silverware and condiments that you can use. My husband waited in line for our food while I set the kids up at a table and by the time they were set up and eating, he was back with our food. We saved about $20-25 a day doing this. We also brought many other snacks in our snack bags. 


4. Any counter service restaurant will give you a free cup of water, we brought water bottles and saved a lot of money on water. We also brought some bottles of cold and frozen water to have in a pinch and put them on our stroller. Read more about how we packed our stroller here.

5. Because we purchased annual passes we also received a discount of 10-20% at certain restaurants and shopping at Disney. Annual passes also included Disney Photo Pass, which we loved. 

6.  We did the Bippity Boppity Boutique, which is pricey - but we saved some $ by purchasing their dresses in advance. We told the kids that their fairy god mother delivered them, which added to the excitement of the day when they wake up. You can purchase them at the Disney Store on sale, online or second hand for cheap. Kids don't check for tags, so you'll be in the clear. 


Check out my other blogs on how to #HackYourDisneyVacation

Disney Hacks: The Stroller Edition

Disney Hacks: How to Pack a Disney Grab Bag

Disney Hacks - How to Pack a Disney Grab Bag

Looking for NO-FEE Concierge Disney Vacation Planning? I'd love to chat with you about how to make your family's Disney Vacation (World, Land, Cruise, Aulani, Hilton Head, Adventures) seamless, fun (even for you Mom!) and full of life-long memories. Email me at Lareina@WaltsWorldVacations or on Facebook at Lareina with Walt's World Vacations.

Knowing what you'll need to bring with you to the parks is essential to a good Disney vacation. Here is how to #HackYourDisneyVacation by packing the perfect Disney grab bag.


So there are many things you'll want to bring with you to the park, but only the essentials need to be in your grab bag if you're also bringing a stroller to hold your other less important items.

Leave with the stroller (see my blog for more info about how to select and pack the perfect stroller)
  • Ponchos, food and water bags, blanket, water fans, LED glow items
Pack in your Disney Grab Bag
  • Wallet with credit cards, license & cash
  • Magic Bands
  • 2 pairs of sunglasses for each person
  • Sunscreen
  • Bandaids
  • Triple Antibiotic Ointment
  • Ibuprofen for kids and adults
  • Nail scissors 
  • Camcorder
  • Camera
  • Battery pack phone charger (you will ROLL though your phones battery in Disney)
  • Plug in phone charger
  • A change of clothes in plastic bags for each kid (this could also be left with the strollers)
  • Diapers
  • Wipes
  • Hand Sanitizer
  • Bug Spray (especially with the Zika virus) 
  • Water bottle (I keep one with me at all times)
  • A dry snack (usually a snack bar) for each kid
  • Lip balm
  • Gum (they don't sell gum in Disney) or mints
  • bubbles (for waiting in line)
  • Games to play while waiting in line (uno, 5 second rule) 
No selfie sticks, costumes if you're over 12 or alcohol - they won't let you in the park with any of it!

Check out my other #HackYourDisneyVacation blog posts

Disney Hacks: Saving Money

Disney Hacks: The Stroller Edition 

Wednesday, March 1, 2017

Anders Ruff Workshop in Pineville & Davidson, NC


This mama is a level 10 goddess with a glue gun, but a nail gun? Not so much.... it gives me flash backs of the staple gun incident of 2005 (see this video for the embarrassing details). However, I do love honing my DIY skills and attending workshops. When the lovelies at Anders Ruff Workshop in Pineville, NC invited us to blog about one of their workshops I decided I'd have to leave my torrid staple gun history in the past and learn a cool new skill.


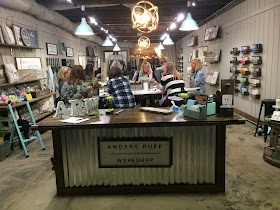
If you haven't checked out AR Workshop, you'll love what they're all about. In addition to creating useful and beautiful custom DIY masterpieces the ambiance is like stepping into a designer magazine.


The colors, the textures and the decor are all on trend. Their aesthetics woven with creativity and know-how provides the perfect backdrop for a memorable GNO, date night, party or just some YOU time.


I've been obsessed with all the projects I've been seeing on their Instagram, so choosing just one from all of their carefully selected options was hard! The ability to choose something that fit my home decor, while my cousin chose something that fit her home decor was one of my favorite things about the AR Workshop. We didn't all have to do the exact same project unless we wanted to.

I opted for the signature family established centerpiece box.


My cousin chose the monogram laurel wreath established plank wood sign. 


We saddled up to our benches to survey our wood, tools and pre-printed custom templates. Then we chose our stain and paint colors. We met Jeanette our table lead, who shared insider tips and helped us through each step of the project. If you are a super savvy with all things wood and power tools, or if you're a total newbie, the ladies at AR Workshop can adjust their instruction to make sure you're feeling confident and empowered to create something totally unique. 


Jeanette showed us how to use different tools and techniques to smooth then destress the wood. Next she guided us through staining, dry brushing and additional distressing with a hand sander. It was an interesting process to get hand-on-experience with. I already have another project at home that I plan to try wood distressing on with my new found knowledge. 


I received one-on-one instruction with the nail gun and was able to overcome my nervousness about using the power tool. My cousin and I laughed, distressed (in a wood-way) and enjoyed our conversation as we created our custom projects. We applied the customized template and technique to ensure that the letters didn't bleed outside of the lines. 


We did a tour around the workshop to see everyone's finished products, check out the Facebook LIVE video here. I was really excited about how my centerpiece box came out, it's going to be the perfect addition to our dining room table, and it's fun to tell people that lil 'ol me made it. 


To schedule your one-of-a-kind workshop experience with AR Workshop you can check out all their workshop locations and projects here. You can follow them on Facebook here and Instagram Pineville here and Instagram Davidson here.